Cerere oferta

    Tastează codul: captcha

      Descarcă catalogul TopMetrology

      Tastează codul din dreapta in câmpul de jos: captcha

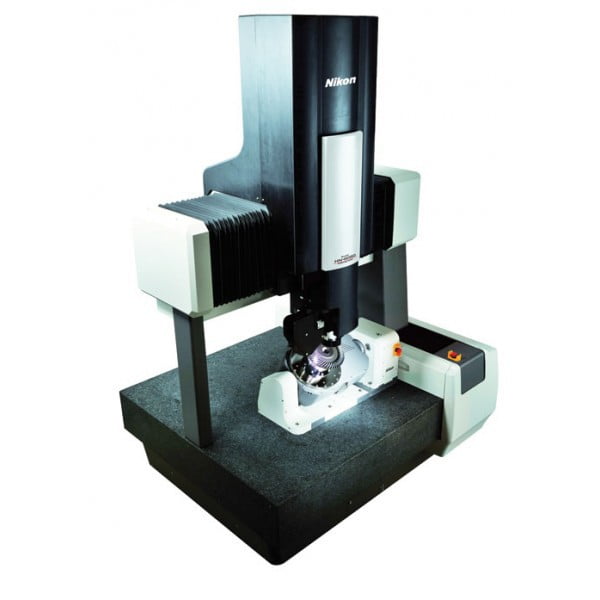
      Nikon HN-6060 Multi-sensor metrology systems

      Fast, high-precision, non-contact inspection of complex shapes with tactile accuracy


      The HN-6060 multi-sensor 3D metrology system makes automatic non-contact shape measurement of complex components a reality. Equipped with a newly developed high-speed and high-precision laser scanner and SFF (shape from focus) sensor the HN-6060 is suited to perform high-precision inspection of shapes even with glossy surfaces or without surface texture. Touch probes and optical heads with built-in TTL laser AF (with proven performance in Nikon’s NEXIV VMR series CNC Video Measuring System) complete the multi-sensor system.


      Key benefits:

      • High precision and high quality results with non-contact measurement
      • High stability due to rigid 5-axis hardware
      • Easy preparation and operation
      • Fast, automated scanning and inspection
      • Multi-sensors cover a wide application range
      • Seamless integration with dedicated measurement software


      Categories: High accuracy scanning

      Applications: Powertrain Components


      Non-contact high-precision laser scanner
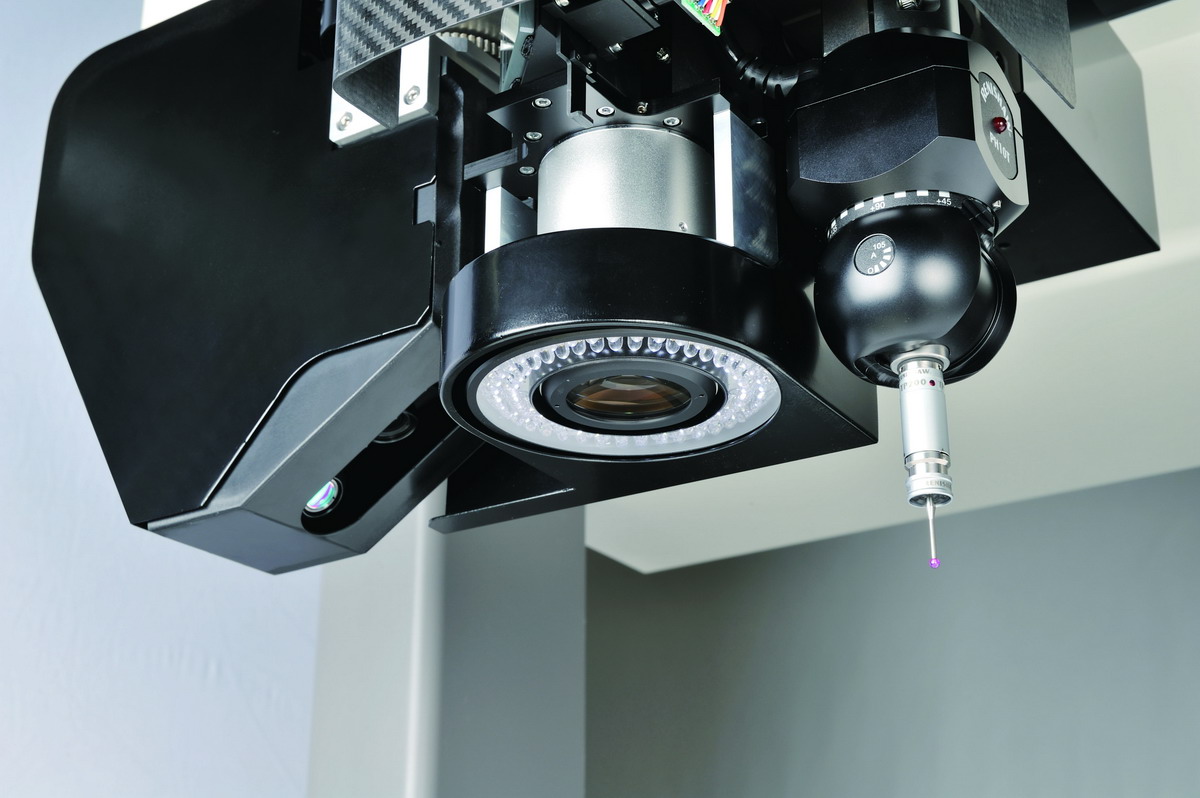
      The new non-contact high-precision laser scanner captures point clouds from part surfaces with high speed, precision, and density, resulting in a digital copy of the part surface. The resolution of the point clouds allows not only capturing of shape and form, but also waviness dimension.


      Measurement of complex 3D form parts
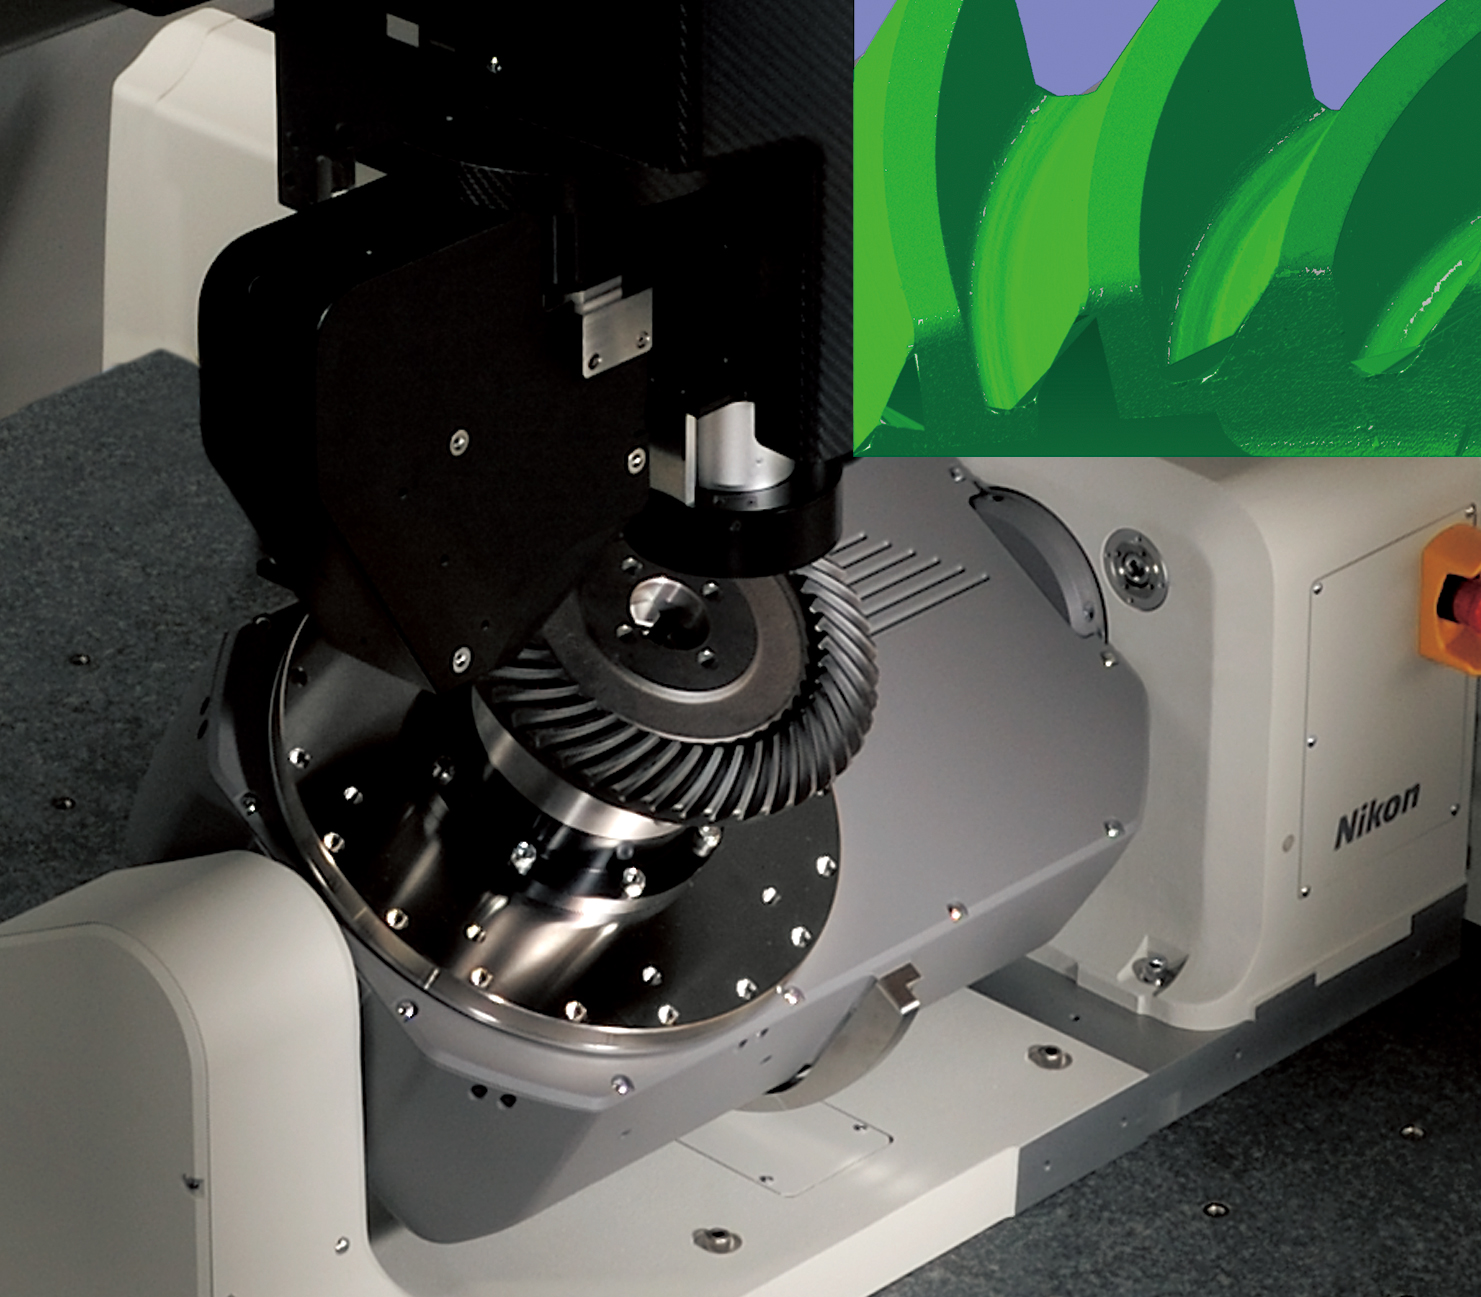
      With a 5 axes synchronized hardware control allowing the optimum part orientation to the sensor, the HN-6060 can measure the part from different angles. The system is not only designed to measure complex shaped gear teeth surfaces such as hypoid gears, worm gears, helical gears, but also inspects turbine blades, digital camera housings, complex closures and more. Until now, users of traditional tactile inspection tools for gear inspection needed to rely on 2D sections of surface data. With the HN-6060, a new world of inspection possibilities opens as the 3D surface data reveals all shape and waviness information in a simple measurement.


      Newly developed sensors for non-contact measurement of any material
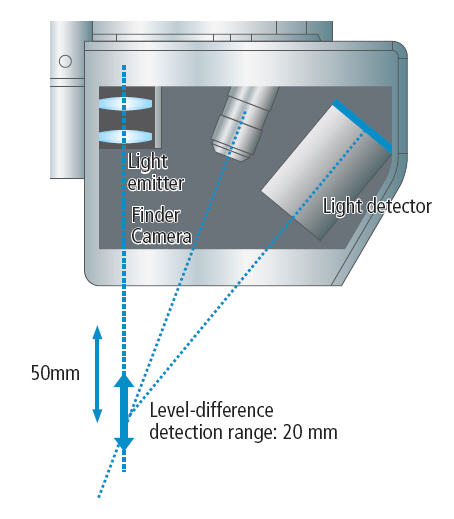
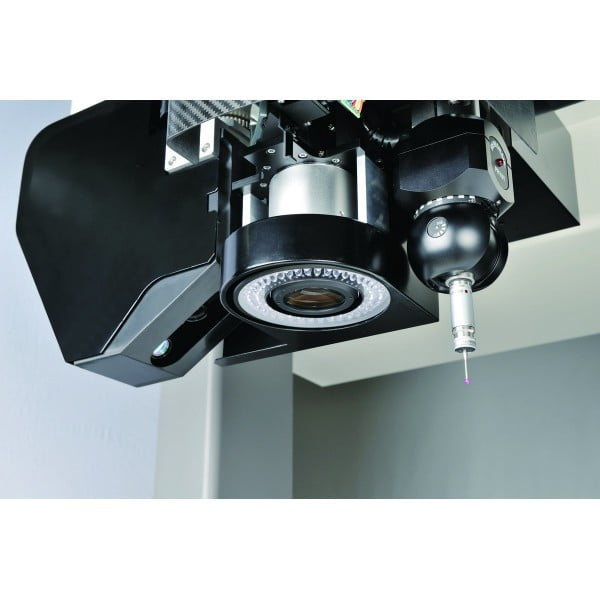
      Nikon’s newly developed high precision laser scanner sensor and Shape-From-Focus (SFF) imaging sensor measure the part surfaces with different approaches. Without the need for manual preparation such as white-powdering*, the system captures highly repeatable and reproducible 3D data from shiny surfaces or surfaces with different reflectivity.

      * It is usual that most non-contact 3D digitizers or scanners require white powdering process for higher and equal reflection in order to measure shiny or dark-colored surfaces. Therefore, the point clouds digitized by most of 3D scanners have uncertainty inherent to coating layer thickness.


      High accuracy and stability of main CMM body
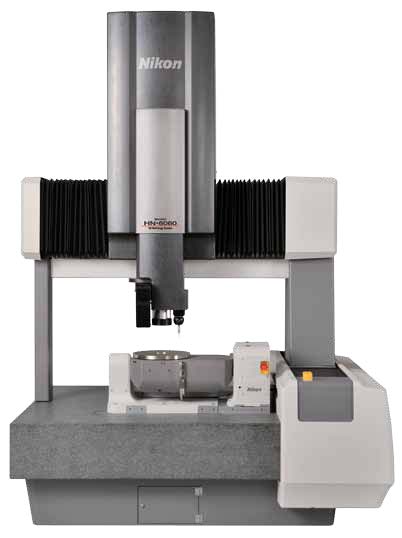
       

      The extreme stiffness of the main CMM body guarantees long-term stability and accuracy. Along with a linear motor drive mechanism, high-rigidity air-bearing structure, the adoption of Nikon’s newly designed low thermal expansion encoder scales is employed for the three-axis orthogonal section, guaranteeing high-precision inspection over a long period of time.


      A high level of user operability
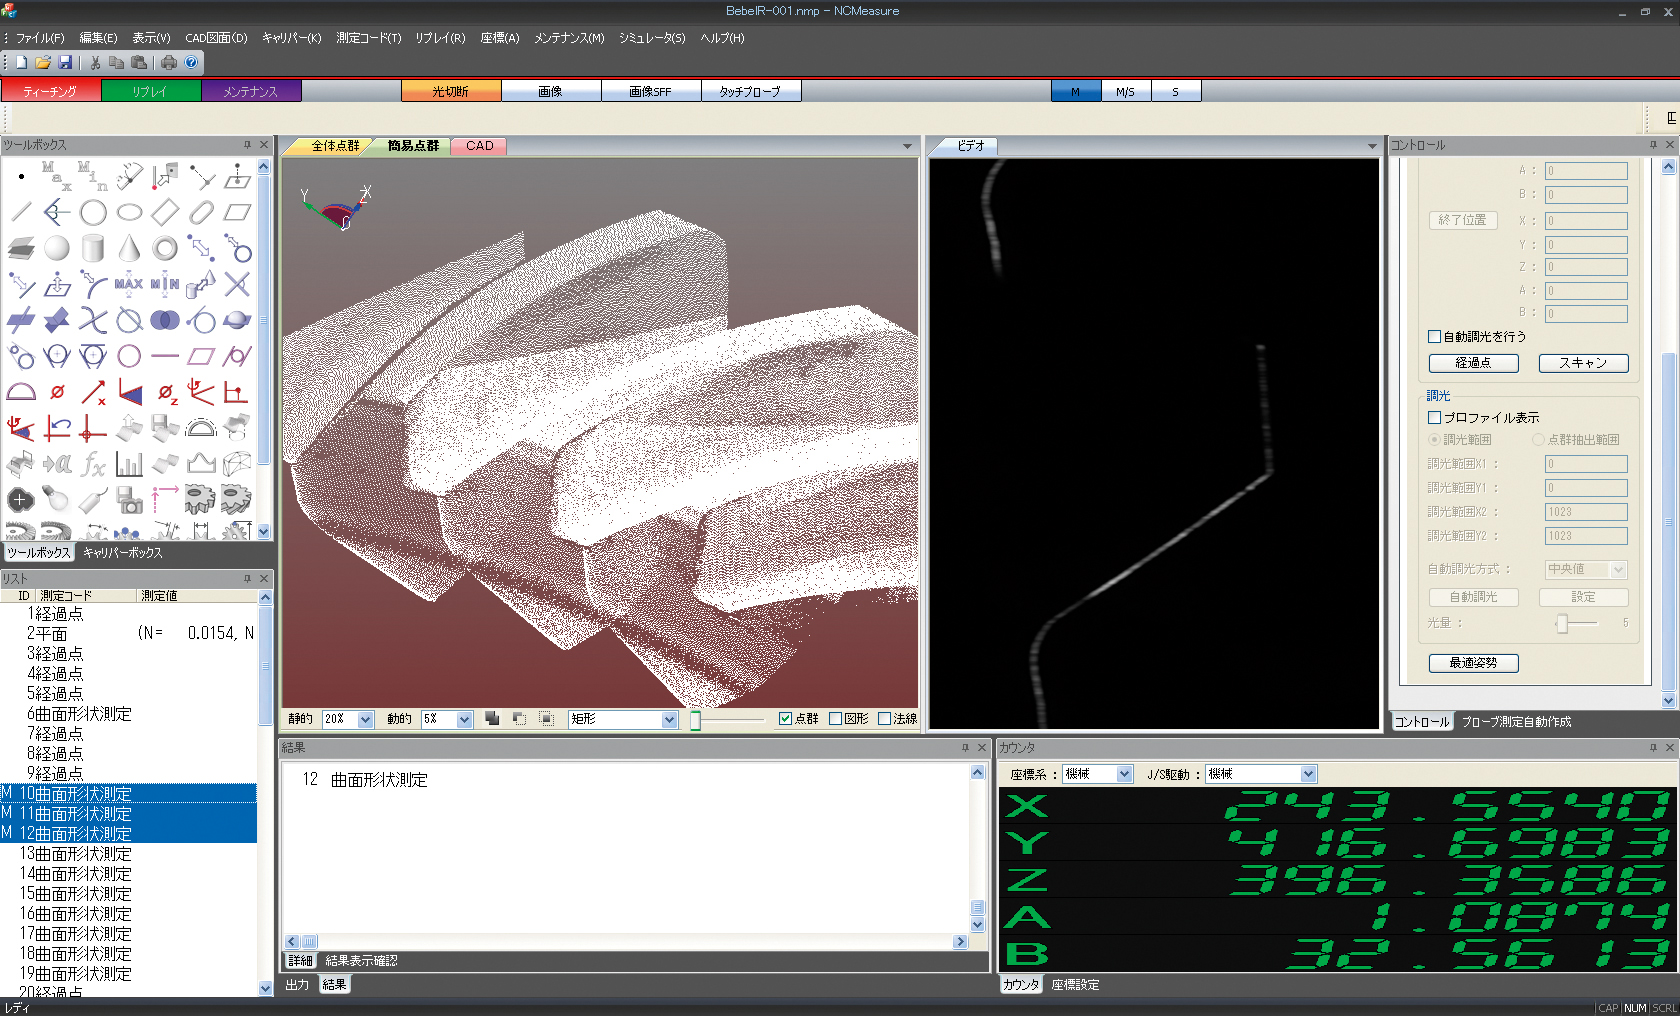
      The ergonomic design of seamlessly integrated hardware and software takes full account of user safety and operability, such as fixed viewpoint joystick operation for easy acquisition of point clouds from 3D shapes and simulation for collision avoidance. The HN-6060 makes non-contact shape inspection a reality.


      3D multi-sensor software seamlessly integrates with downstream point cloud applications
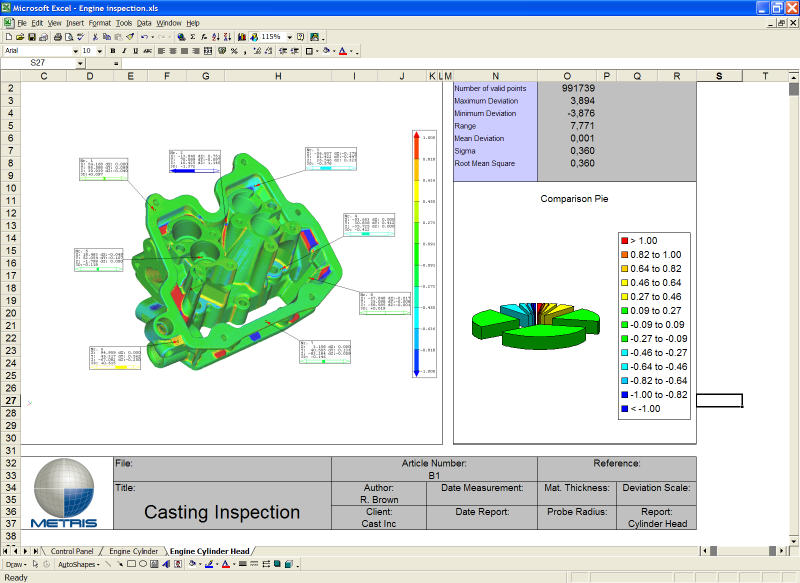
      Newly developed HN Metrology 3D software integrates a whole range of tasks, including touch probe and image-processing measurement, acquisition of point clouds using high-precision laser scanner, and SFF sensor with built-in active texture projection mechanism. Offline / Online simulation based on the CAD model enables to verify device operation in advance.
      Nikon Metrology’s Focus Inspection software allows full 3D Part-to-CAD deviation comparison, GD&T evaluation and creation of detailed reports based on high-precision point cloud and mesh data. All other major brand application software for inspection and reverse engineering can handle the HN-6060’s high quality point cloud data, too.

      Description

      Fast, high-precision, non-contact inspection of complex shapes with tactile accuracy


      The HN-6060 multi-sensor 3D metrology system makes automatic non-contact shape measurement of complex components a reality. Equipped with a newly developed high-speed and high-precision laser scanner and SFF (shape from focus) sensor the HN-6060 is suited to perform high-precision inspection of shapes even with glossy surfaces or without surface texture. Touch probes and optical heads with built-in TTL laser AF (with proven performance in Nikon’s NEXIV VMR series CNC Video Measuring System) complete the multi-sensor system.


      Key benefits:

      • High precision and high quality results with non-contact measurement
      • High stability due to rigid 5-axis hardware
      • Easy preparation and operation
      • Fast, automated scanning and inspection
      • Multi-sensors cover a wide application range
      • Seamless integration with dedicated measurement software


      Categories: High accuracy scanning

      Applications: Powertrain Components


      Non-contact high-precision laser scanner

      The new non-contact high-precision laser scanner captures point clouds from part surfaces with high speed, precision, and density, resulting in a digital copy of the part surface. The resolution of the point clouds allows not only capturing of shape and form, but also waviness dimension.


      Measurement of complex 3D form parts

      With a 5 axes synchronized hardware control allowing the optimum part orientation to the sensor, the HN-6060 can measure the part from different angles. The system is not only designed to measure complex shaped gear teeth surfaces such as hypoid gears, worm gears, helical gears, but also inspects turbine blades, digital camera housings, complex closures and more. Until now, users of traditional tactile inspection tools for gear inspection needed to rely on 2D sections of surface data. With the HN-6060, a new world of inspection possibilities opens as the 3D surface data reveals all shape and waviness information in a simple measurement.


      Newly developed sensors for non-contact measurement of any material

      Nikon’s newly developed high precision laser scanner sensor and Shape-From-Focus (SFF) imaging sensor measure the part surfaces with different approaches. Without the need for manual preparation such as white-powdering*, the system captures highly repeatable and reproducible 3D data from shiny surfaces or surfaces with different reflectivity.

      * It is usual that most non-contact 3D digitizers or scanners require white powdering process for higher and equal reflection in order to measure shiny or dark-colored surfaces. Therefore, the point clouds digitized by most of 3D scanners have uncertainty inherent to coating layer thickness.


      High accuracy and stability of main CMM body


      The extreme stiffness of the main CMM body guarantees long-term stability and accuracy. Along with a linear motor drive mechanism, high-rigidity air-bearing structure, the adoption of Nikon’s newly designed low thermal expansion encoder scales is employed for the three-axis orthogonal section, guaranteeing high-precision inspection over a long period of time.


      A high level of user operability

      The ergonomic design of seamlessly integrated hardware and software takes full account of user safety and operability, such as fixed viewpoint joystick operation for easy acquisition of point clouds from 3D shapes and simulation for collision avoidance. The HN-6060 makes non-contact shape inspection a reality.


      3D multi-sensor software seamlessly integrates with downstream point cloud applications

      Newly developed HN Metrology 3D software integrates a whole range of tasks, including touch probe and image-processing measurement, acquisition of point clouds using high-precision laser scanner, and SFF sensor with built-in active texture projection mechanism. Offline / Online simulation based on the CAD model enables to verify device operation in advance.
      Nikon Metrology’s Focus Inspection software allows full 3D Part-to-CAD deviation comparison, GD&T evaluation and creation of detailed reports based on high-precision point cloud and mesh data. All other major brand application software for inspection and reverse engineering can handle the HN-6060’s high quality point cloud data, too.
      View more See less

      Do you have more questions?

      You can request an offer

      Nikon HN-6060 Multi-sensor metrology systems

      Request offer

      Funding

      Financing solutions for the purchase of new equipment, through BCR Leasing or Grenke.

      See Financing Methods

      See Product Catalog

      You can find all our products that you can always rely on!

      Open the Catalog