Cerere oferta

    Tastează codul: captcha

    https://topmetrology.ro/wp-content/uploads/2021/02/xt-h-series-en.pdf

      Descarcă catalogul TopMetrology

      Tastează codul din dreapta in câmpul de jos: captcha

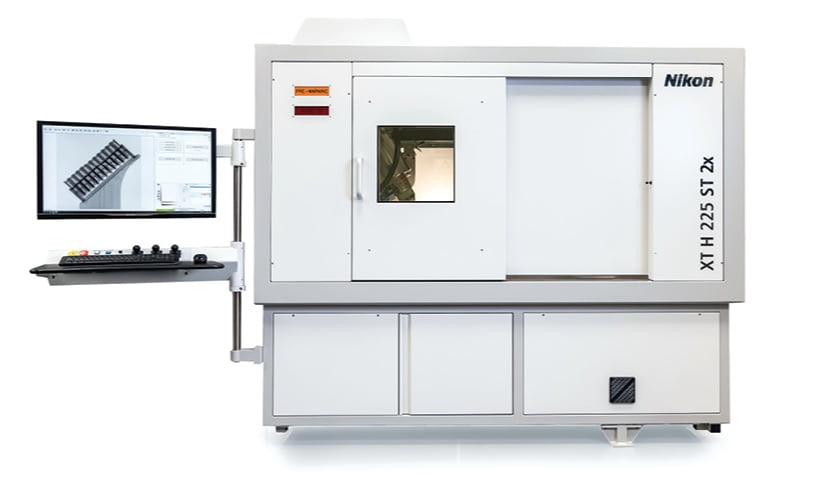
      New X-ray CT system with enhanced inspection and double productivity Nikon XT H 225 ST 2x

      New X-ray CT system with enhanced inspection and double productivity
      Five unique new features: Rotating.Target 2.0 | Local.Calibration , Auto.Filament Control | Quick.Change | Half.Turn CT
      XT H 225 ST 2x Productivity without compromise

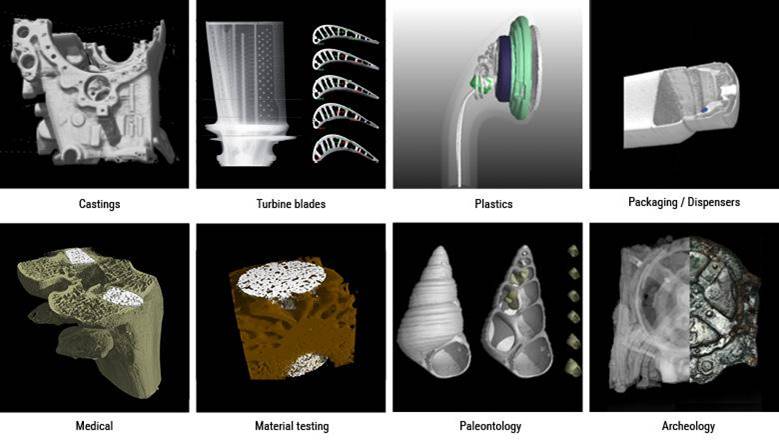
      For many years, X-ray CT (computed tomography) has been used in laboratories for inspecting the interior of samples such as fossils and artefacts. More recently, this valuable technology has been finding its way into the manufacturing environment for quality control applications. It is able to non-destructively detect voids, burrs, cracks and other imperfections inside components and assemblies, including those that have been additively manufactured. It also serves as a metrology tool to ensure dimensional compliance, both internally and externally, to a high degree of accuracy.

      However, manufacturers are no longer only finding failures in a manufacturing process. The usefulness of CT goes even further on the factory floor by allowing a production line to be adjusted continuously in real-time to prevent components falling out of tolerance. By combining unique hardware with innovative software, the XT H 225 ST 2x delivers the efficiency,  reliability and accuracy required for these production applications. Throughout the entire time to market of a user’s new product, all steps from R&D through production line setup and pre-series trial runs to full production are supported.


      Product overview

      The integration of industry-leading features into the XT H 225 ST 2x microfocus X-ray CT system allows a doubling of data acquisition speed and hence of inspection productivity. It is a result of using advanced detector technology combined with new functionality including Half.Turn CT and Rotating.Target 2.0.


      Benefits & features
      Half.Turn CT, faster CT acquisition

      Instead of rotating the sample under investigation through 360 degrees while the X-rays directed at it are either absorbed or pass through to the detector, Nikon Metrology has devised a method that allows sufficient data to be obtained by rotating the sample through just over 180 degrees.

      Complete in-house control over the development of world-leading reconstruction software has facilitated the Half.Turn CT breakthrough, as it enabled the introduction of novel automatic centre of rotation calculation coupled with optimization of the reconstruction algorithm. Together they eliminate artefacts introduced by rotating a sample through less than 360 degrees. As a consequence, an image is produced automatically without loss of quality or accuracy from about half of the data usually acquired with conventional CT.


      Unique rotating target

      Nikon Metrology is the only company in the world to supply X-ray CT systems with a rotating target technology. Other products on the market, which use heat-absorbing materials, require cool-down periods and may have power limitations, but the unique 225kV rotating target allows continuous operation across its entire power range up to 450W for superior inspection productivity.

      The liquid-cooled, rotating target technology adds further capabilities for power, resolution and reduction of scan time. It efficiently disperses the heat generated as the electron beam hits the surface to generate X-ray photons, boosting the flux by up to 5-times, enabling up to 3 times higher resolution for the same power, or allowing data to be collected 3-5x faster for the same resolution.


      Auto.Filament Control and Quick.Change

      High-resolution microfocus X-rays start with electrons emitted from a thin filament that has to be replaced periodically. Less frequent changing of the filament is desirable, as it means that system availability is higher. Long-life filaments are available but they are thicker, so the high resolution nature of the microfocus X-rays is lost. With the XT H 225 ST 2x, the user no longer has to choose between high-resolution and long-life filaments. Auto.Filament Control intelligently controls the X-ray source to double the lifetime of the filament and increase system availability.

      Nikon Metrology is able to implement these algorithms as its sources are designed and manufactured in-house, providing the ability and expertise to control the source in such a way that operational life is increased.

      When the filament does have to be replaced, downtime is considerably lowered by the introduction of Quick.Change plug-and-play filament cups. This convenient, highly repeatable procedure eliminates human error. In addition, the filaments themselves have been aligned and conditioned by Nikon Metrology’s X-ray engineers to deliver optimal performance.


      Local.Calibration, high accuracy CT measurements

      Local.Calibration allows fast, automated calibration of voxel size at any CT scan position, rather than the user having to perform the function manually. It leads to a radical improvement in measurement accuracy for metrology applications. Further benefits are that the procedure is deskilled and dimensional accuracy is traceable. As the CT scan position is calibrated with reference to a known artefact, measurements can be made with a high level of confidence.


      X-ray source for every application

      At the heart of Nikon Metrology’s superior image quality is world-leading X-ray source technology. Where competitor models require dual-tube configurations for flexibility, the design of Nikon’s unique in-house X-ray source in the XT H 225 ST 2x allows up to 4 target heads to fit onto the same X-ray tube base, resulting in unique flexibility and performance from just a single tube.

      The easily interchangeable X-ray targets allow optimisation for a wide range of samples, offering a transmission target with sub-micron feature recognition, through the 225kV reflection target (with unique multi-metal target option), to the world’s only rotating target design for outstanding performance.


      Automation and integration

      The XT H series provides automation modes to maximize CT productivity. Automated production workflows are fully customisable, with automated scanning, reconstruction and data analysis. In-house CT Pro software offers world-leading reconstruction times performed by Nikon Metrology’s expertly configured, high-performance computer specifications, with image enhancement and artefact removal options included as standard.

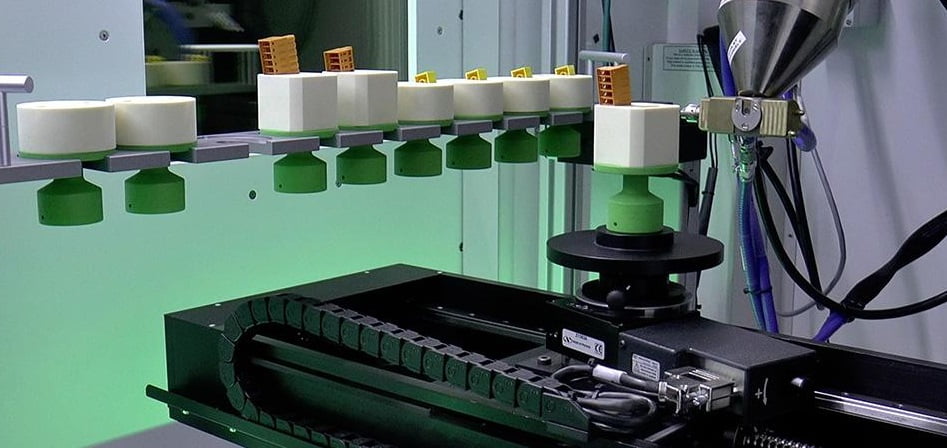
      With full control through IPC communication, the XT H series can be configured with auto-loaders and robot retrofit for full automation and seamless integration into a production line. After providing superior image quality and leading reconstruction times, customisable analysis tools are available with data output compatible with both in-house and all industry-leading third party software for automating sample-specific analysis.

      Download the brochure

      Description

      New X-ray CT system with enhanced inspection and double productivity
      Five unique new features: Rotating.Target 2.0 | Local.Calibration , Auto.Filament Control | Quick.Change | Half.Turn CT
      XT H 225 ST 2x Productivity without compromise

      For many years, X-ray CT (computed tomography) has been used in laboratories for inspecting the interior of samples such as fossils and artefacts. More recently, this valuable technology has been finding its way into the manufacturing environment for quality control applications. It is able to non-destructively detect voids, burrs, cracks and other imperfections inside components and assemblies, including those that have been additively manufactured. It also serves as a metrology tool to ensure dimensional compliance, both internally and externally, to a high degree of accuracy.

      However, manufacturers are no longer only finding failures in a manufacturing process. The usefulness of CT goes even further on the factory floor by allowing a production line to be adjusted continuously in real-time to prevent components falling out of tolerance. By combining unique hardware with innovative software, the XT H 225 ST 2x delivers the efficiency,  reliability and accuracy required for these production applications. Throughout the entire time to market of a user’s new product, all steps from R&D through production line setup and pre-series trial runs to full production are supported.


      Product overview

      The integration of industry-leading features into the XT H 225 ST 2x microfocus X-ray CT system allows a doubling of data acquisition speed and hence of inspection productivity. It is a result of using advanced detector technology combined with new functionality including Half.Turn CT and Rotating.Target 2.0.


      Benefits & features
      Half.Turn CT, faster CT acquisition

      Instead of rotating the sample under investigation through 360 degrees while the X-rays directed at it are either absorbed or pass through to the detector, Nikon Metrology has devised a method that allows sufficient data to be obtained by rotating the sample through just over 180 degrees.

      Complete in-house control over the development of world-leading reconstruction software has facilitated the Half.Turn CT breakthrough, as it enabled the introduction of novel automatic centre of rotation calculation coupled with optimization of the reconstruction algorithm. Together they eliminate artefacts introduced by rotating a sample through less than 360 degrees. As a consequence, an image is produced automatically without loss of quality or accuracy from about half of the data usually acquired with conventional CT.


      Unique rotating target

      Nikon Metrology is the only company in the world to supply X-ray CT systems with a rotating target technology. Other products on the market, which use heat-absorbing materials, require cool-down periods and may have power limitations, but the unique 225kV rotating target allows continuous operation across its entire power range up to 450W for superior inspection productivity.

      The liquid-cooled, rotating target technology adds further capabilities for power, resolution and reduction of scan time. It efficiently disperses the heat generated as the electron beam hits the surface to generate X-ray photons, boosting the flux by up to 5-times, enabling up to 3 times higher resolution for the same power, or allowing data to be collected 3-5x faster for the same resolution.


      Auto.Filament Control and Quick.Change

      High-resolution microfocus X-rays start with electrons emitted from a thin filament that has to be replaced periodically. Less frequent changing of the filament is desirable, as it means that system availability is higher. Long-life filaments are available but they are thicker, so the high resolution nature of the microfocus X-rays is lost. With the XT H 225 ST 2x, the user no longer has to choose between high-resolution and long-life filaments. Auto.Filament Control intelligently controls the X-ray source to double the lifetime of the filament and increase system availability.

      Nikon Metrology is able to implement these algorithms as its sources are designed and manufactured in-house, providing the ability and expertise to control the source in such a way that operational life is increased.

      When the filament does have to be replaced, downtime is considerably lowered by the introduction of Quick.Change plug-and-play filament cups. This convenient, highly repeatable procedure eliminates human error. In addition, the filaments themselves have been aligned and conditioned by Nikon Metrology’s X-ray engineers to deliver optimal performance.


      Local.Calibration, high accuracy CT measurements

      Local.Calibration allows fast, automated calibration of voxel size at any CT scan position, rather than the user having to perform the function manually. It leads to a radical improvement in measurement accuracy for metrology applications. Further benefits are that the procedure is deskilled and dimensional accuracy is traceable. As the CT scan position is calibrated with reference to a known artefact, measurements can be made with a high level of confidence.


      X-ray source for every application

      At the heart of Nikon Metrology’s superior image quality is world-leading X-ray source technology. Where competitor models require dual-tube configurations for flexibility, the design of Nikon’s unique in-house X-ray source in the XT H 225 ST 2x allows up to 4 target heads to fit onto the same X-ray tube base, resulting in unique flexibility and performance from just a single tube.

      The easily interchangeable X-ray targets allow optimisation for a wide range of samples, offering a transmission target with sub-micron feature recognition, through the 225kV reflection target (with unique multi-metal target option), to the world’s only rotating target design for outstanding performance.


      Automation and integration

      The XT H series provides automation modes to maximize CT productivity. Automated production workflows are fully customisable, with automated scanning, reconstruction and data analysis. In-house CT Pro software offers world-leading reconstruction times performed by Nikon Metrology’s expertly configured, high-performance computer specifications, with image enhancement and artefact removal options included as standard.

      With full control through IPC communication, the XT H series can be configured with auto-loaders and robot retrofit for full automation and seamless integration into a production line. After providing superior image quality and leading reconstruction times, customisable analysis tools are available with data output compatible with both in-house and all industry-leading third party software for automating sample-specific analysis.

      View more See less

      Do you have more questions?

      You can request an offer

      New X-ray CT system with enhanced inspection and double productivity Nikon XT H 225 ST 2x

      Request offer

      Funding

      Financing solutions for the purchase of new equipment, through BCR Leasing or Grenke.

      See Financing Methods

      See Product Catalog

      You can find all our products that you can always rely on!

      Open the Catalog