Nikon MM-400/800

Seamlessly integrates digital imaging with industrial metrology.
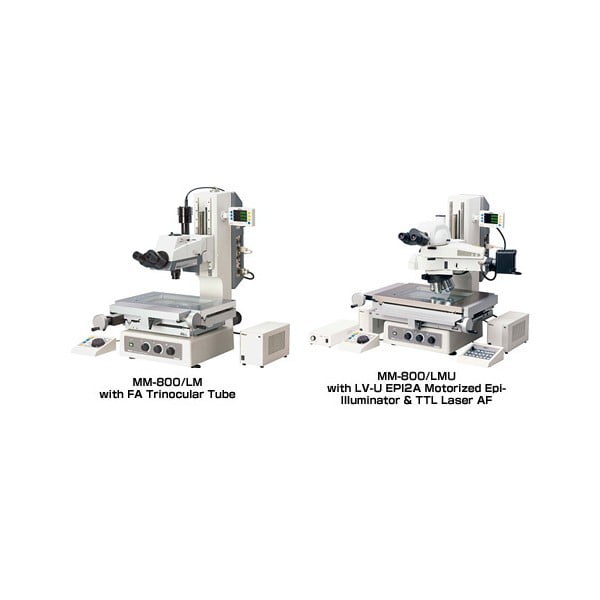
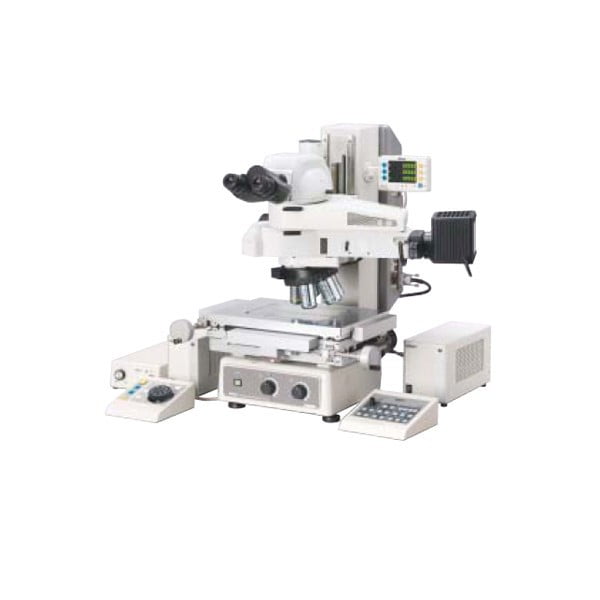
The MM400/800 is a new series of innovative measuring microscopes designed for industrial measurement and image analysis. They integrate key performance features delivering complete digital control for maximum measuring accuracy in demanding industrial environments. The systems support a host of new and expanded features including Nikon’s electronic connection hub connection that provides total integration of microscope peripherals managed by Nikon’s EMAX2 metrology software.
Categories: Measuring Microscopes
Applications: Cracks and Failure Analysis, Implants/Protheses, Surface Analysis, MEMS, Microelectronics, Optoelectronics, Plastic Manufacturing, Mobile phones, shavers & watches , Telescope optics, Antennae, Telecom & Electronics, Manual examination
Data Processor

The DP-E1 Data Processor is compact, yet easy to use. For quick measurements and data processing you can place the read-out display near the eyepiece while the control pad is placed at your fingertips. The DP-E1’s seamless interface to a PC platform makes it easy to perform computations and management of your measurement results.
New 12×8 Stage for Large Workpieces (MM-800 only)
An enhanced body design using Computer Aided Engineering (CAE) for stress analysis enables the mounting of a larger stage to accommodate larger workpieces. A 300 x 200mm (12 x 8 in) stroke stage can be mounted to the MM-800.
High-Performance Objectives
CFI60 LU Plan Fluor Series: The transmission rate in the UV wavelength range has been improved for the new CFI60 LU Plan Fluor series. These objective lenses are suitable for various research, analysis and examination needs, while maintaining Nikon’s commitment to high NA and long working distance. Only one kind of objective lens is needed for brightfield, darkfield, simple polarizing, DIC and UV epi-fluorescence observations. These objective lenses offer high resolution and ease of use.
CFI60 L Plan EPI CR Series Objective Lenses with Correction Ring: The CFI60 series now includes the CFI60 L Plan EPI CR series objectives to cope with the thinner cover-glass used in liquid crystal displays and highly integrated, dense devices. Coverglass correction can be continuously made from 0 mm up to 1.2mm (0-0.7mm and 0.6-1.3mm for 100x) with the correction ring. The 100x objective lens offers 0.85 high NA, while enabling high-contrast imaging of cells and patterns without being affected by the coverglass.
Versatile Configurations
The design of the MM-400/800 series measuring microscope has been revamped to provide users with increased flexibility in choosing modules for system configurations. The system can be configured according to your needs, using the extra long toolmaker’s objectives (1x to 100x) or the universal system configuration using microscope objectives on a revolving turret. Also the construction of the entire microscope boasts improved rigidity, and offers large high accuracy digital stages. Nikon’s legendary construction maintains its excellent reliability and measurement accuracy over years of heavy use.
3rd-party DRO Connectable (S Models)
The MM-400S, SL and MM-800S, SL models were created for use with Metronics Quadra-Chek and other 3rd-party digital readouts. They offer an economical alternative if non-Nikon data processors are used.
E-MAX Data Processing Software
Digital image measuring performance of the E-MAX software has been upgraded. Combined with Nikon’s digital camera and measuring microscope, the system achieves digital image measurements with precision never before possible.
TTL Laser Autofocus
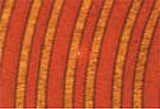
These are the first measuring microscopes to offer an optional TTL Laser Auto-Focus. This Laser AF system features a 0.5 second focusing speed with a repeatability as high as 0.5µm (20x objective 0.75µm spot diameter).
Focusing Aid (FA)
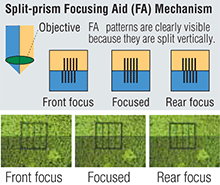
The newly developed split-prism Focusing Aid (FA) delivers sharp patterns to allow accurate focusing during Z-axis measurements. Measurement errors due to differences in the depth of focus of different objectives are minimized.
Built-in Continuous Light Control
A continuous light control is built into the system, enabling light control from the PC without touching the dial on the main body to assure measuring repeatability. Measurements can now be made under the same conditions, ensuring precise video edge detection for repeatable automated measurements.
8-Segment LED Ring Light CYN-E1

This ring light enables illumination control from eight directions. It can be computer controlled using E-Max software for measuring repeatability. It allows edge definition and artifacts of difficult to image parts by controlling angle and intensity of the 8 segments.
Motorized Z-Axis Movement (LM Model Stands)

A motorized vertical movement mechanism with a 10mm/sec. speed has been incorporated. Up/down control is accurately provided with a dedicated controller.
Digital Imaging & Vision Processing
The use of a Nikon microscope digital camera and E-MAX software will streamline your workflow from observation and capture, to the storage of high-definition digital images of your workpieces.
MM Controller Backpack Interface
Illumination, X/Y stage and Z data can be connected to the MM Controller as an interface to an external computer running E-MAX software for data processing and system control.
White LED Illuminator
High intensity white LED illuminators are provided standard for surface and contour illumination. This illuminator features no bulb replacement and constant color temperature, enabling measurement with high-precision and efficiency. For the universal type (except FA), a newly designed 12V/50W halogen light is included. Brightness has been substantially improved, particularly at high magnifications.
Different Stands to Fit the Function
You can select what you need without paying for what you don’t.
The MM400 series handles digital stages up to 6” x 4” and a Z height of 150mm, while the MM800 handles up to a 12” X 6” stage for larger parts with up to 200mm height.
MM400/800 stands for use with Nikon readouts and Emax Data processing software have their encoder boards built-in. S series stands are for use with 3d party Data Processors (Metronics Quadra Check) and are less expensive. Stands which require Z
Axis height measurement are designated with “L” (Linear Encoder) and stands which have motorized Z Axis height are designated with “LM” (Linear Encoder & Motorized).

